Continuing the 3D Printer Surgery Series, here’s part 2 of the extruder upgrade. After nearly 15 hours of printing, I’m calling this new 3D printer extruder a success. The success I believe is down to building the complete extruder assembly in OpenSCAD which allowed me to see how all the parts fitted together. The 3D printer extruder is boasting a unique feature not seen in other popular printer extruders, a rubber pinch roller bearing in the idler, more details down the post.
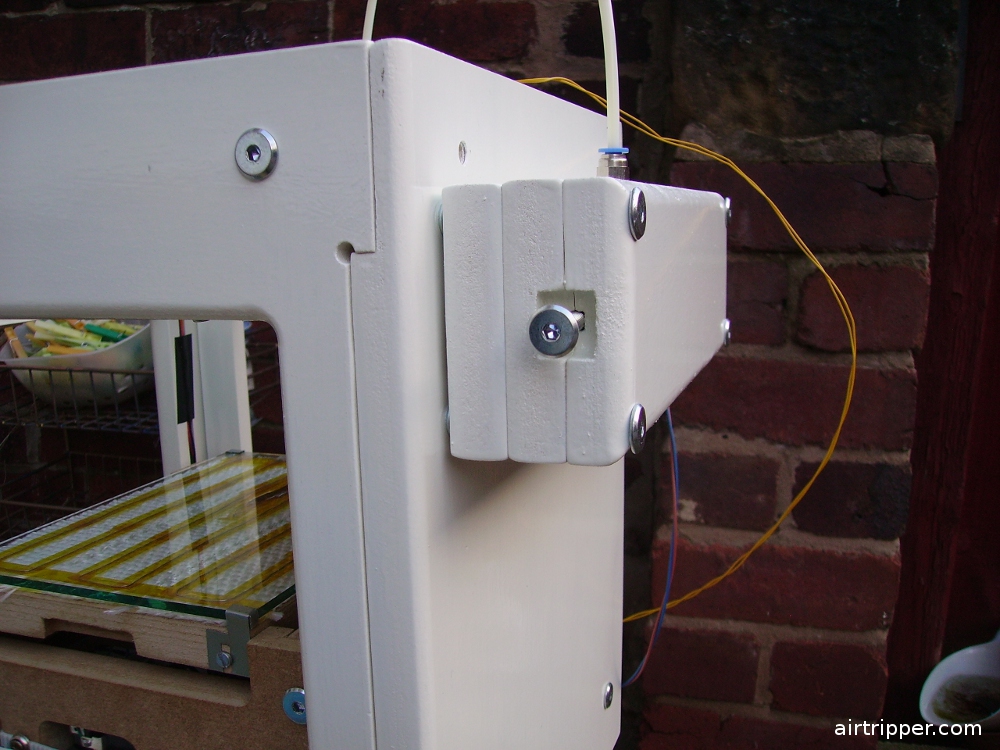
 3D printer bowden extruder with brass insert and support ball bearing |
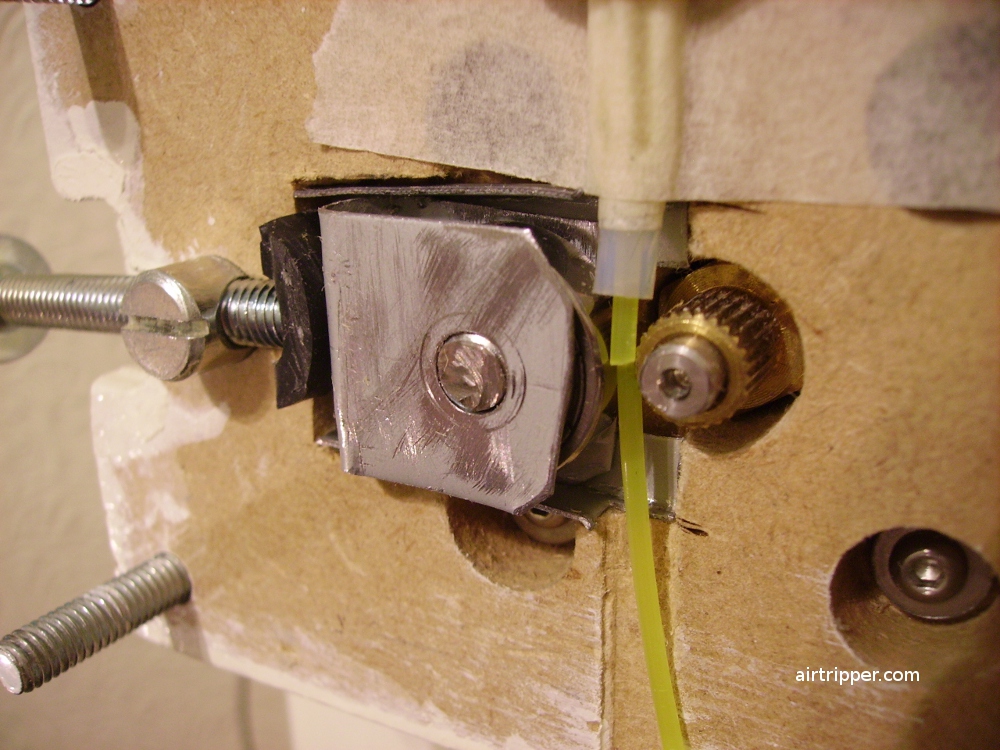
 3D printer bowden extruder with pinch roller idler |
Improvement
The new 3D printer extruder works great, very pleased with the design, and now the extruder is a lot easier to work with. Changing the filament is not such a big deal anymore because now, it’s a lot easier to feed it through the mechanism and in to the bowden tube. All the extruder’s inner workings are now visible making the 3D printer extruder a lot easier to trouble shoot.
 My old 3D printer bowden extruder |
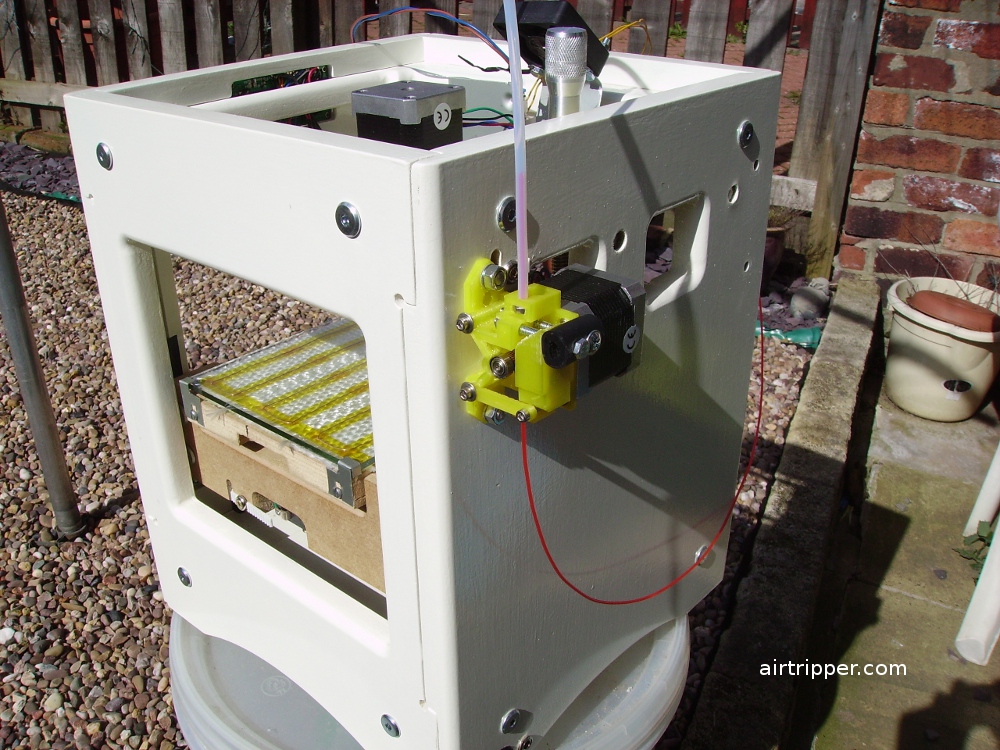 My new 3D printer bowden extruder |
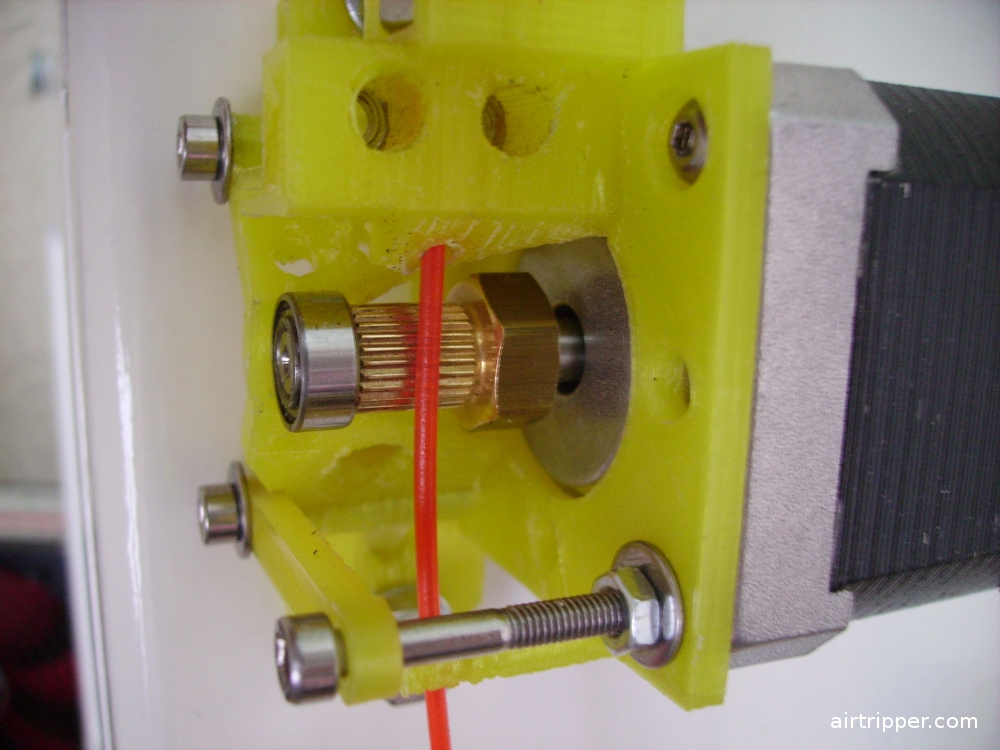
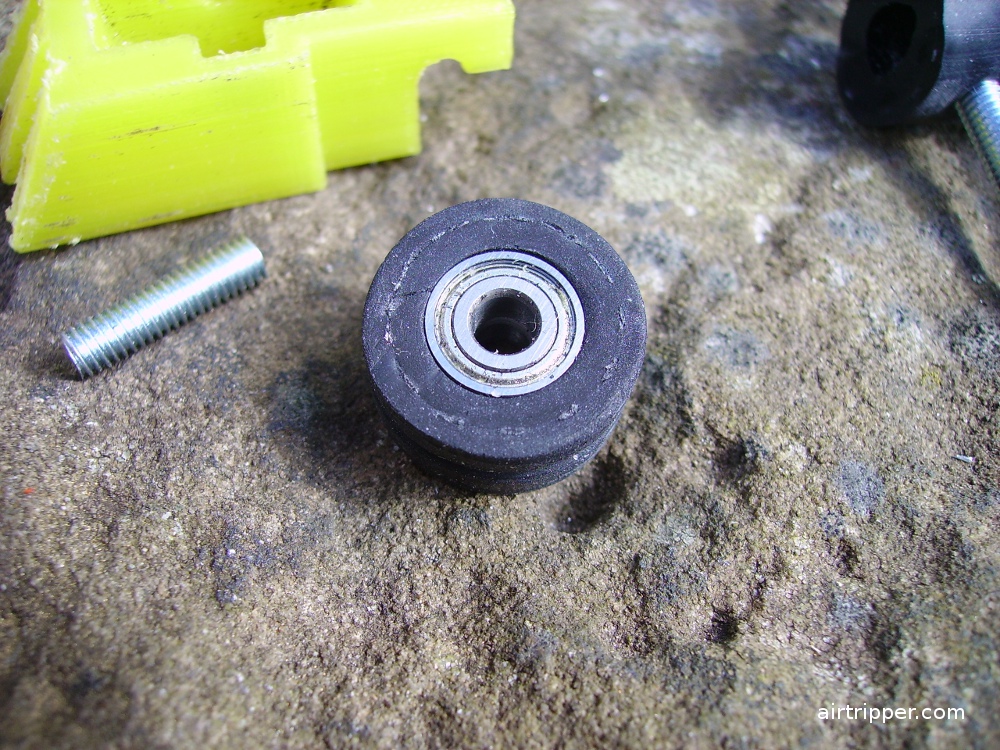
Not only is my 3D printer looking more sophisticated, it’s now 700g lighter on the back side. The most important improvement I was looking for was the extra filament pushing force. I achieved that by using a rubber pinch roller instead of a bare ball bearing, a bare ball bearing common with other extruder designs. Unlike bare ball bearings, the rubber pinch roller has a much wider contact along the filament length, forcing the filament to wrap slightly more a round the brass gear insert. This allowed the brass gear insert to have better contact with the filament which reduced slippage and improved reliability in constant extrusion rate at higher speeds. A small ball bearing has been added to the stepper motor shaft to further support the load and to help extend the stepper motor life.
Tweaking
During the the use of the new 3D printer extruder, I made a few notes to further improve the design and reliability. These improvements will be applied to the files and tested before being made available in Extruder Upgrade Part 3.
 3D Printer Extruder without Idler |
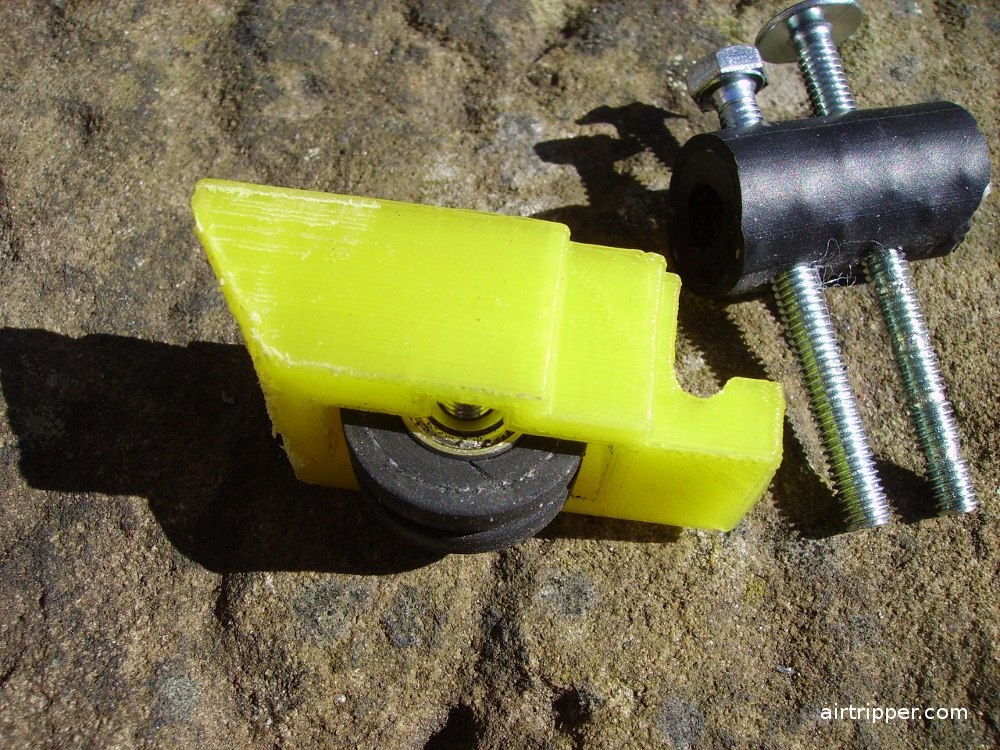 3D Printer Extruder Idler With Pinch Roller and Scews |
- Change the in-feed filament guide hole to an in-feed guide pipe. This is to stop the filament from bending out of line and moving out of the idler’s grip. Only a problem if using a bare ball bearing but not so much of a problem if using the rubber pinch roller, since the pinch roller now has a deep grove filed in to keep the filament in line.
- Modify the out-feed bowden tube bracket so that the tube can be released without unscrewing the tube from the capture nut completely. This will help prevent spoiling the thread made on the tube by trying to screw the tube back in the capture nut, making it easier to remove and replace the bowden tube.
- Replace the M4 screws with M3 screws that hold the extruder idler in place. This will allow me to spread the screws wider apart to hold the idler more squarely. Also, the thinner screws will allow the idler to be removed without removing the screws completely.
- Widen the pinch roller bearing housing in the idler to prevent the rubber roller from scraping the walls. Build in ball bearing spacers in to the wall to keep the bearings centered in the idler housing.
The brass insert gear on the extruder stepper motor is not ideal for 3D printer extruders, but it’s cheap and easy to get hold of. I don’t have a better solution at the moment with out the high cost, so I’ll be leaving this for another day.
Design
I looked at a piece of 3mm glass that I use on my heated build platform and decided that’s a good thickness to start with in the extruder design. So, all the walls of the main body of the extruder and the stepper motor mount is 3mm thick except for the fixing plate, which is 4mm thick. To minimize the amount of plastic used and to cut printing time, I just built plastic in to the design where it was needed, I just used enough plastic to add support and rigidity. I also put extra holes in to the design to help reduce warping during printing and to improve the overall look of the printer extruder.
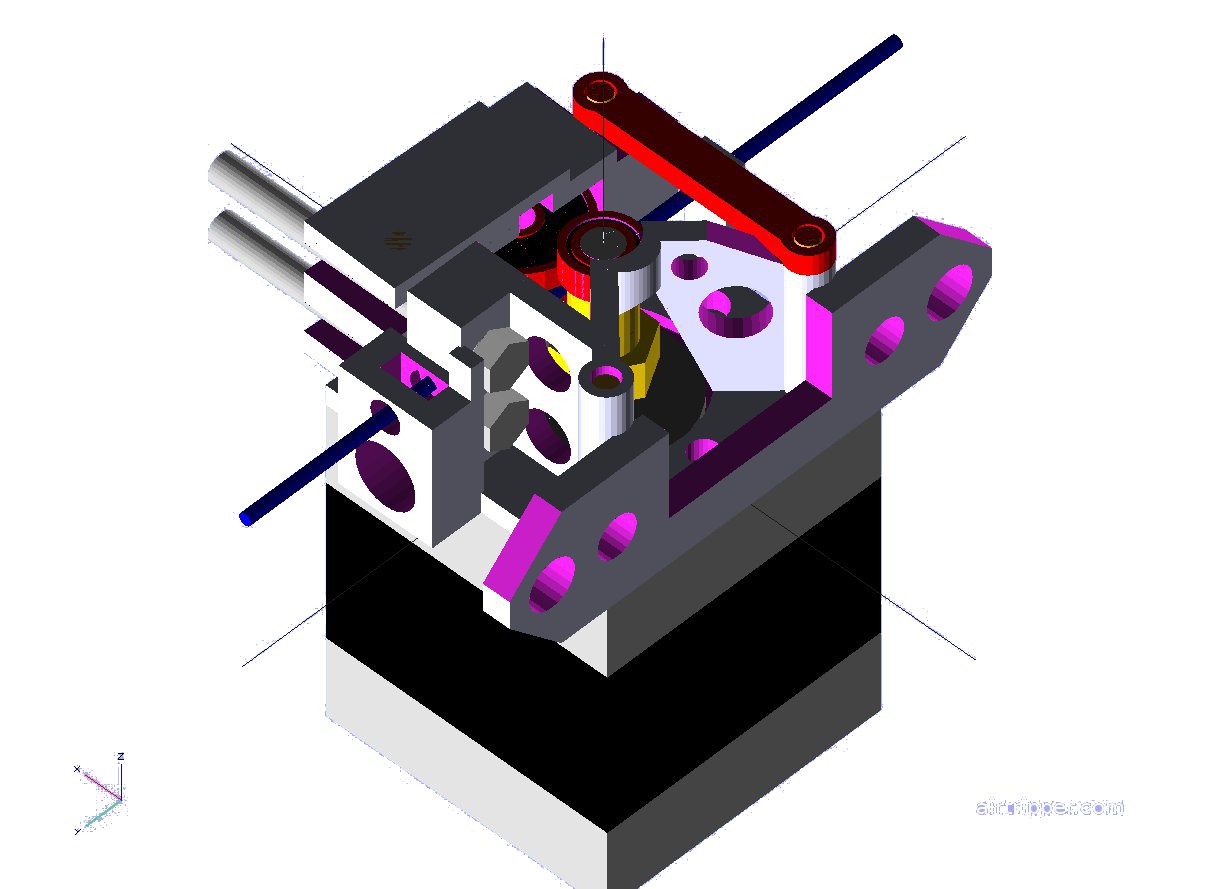 OpenSCAD 3D printer bowden extruder assembly model |
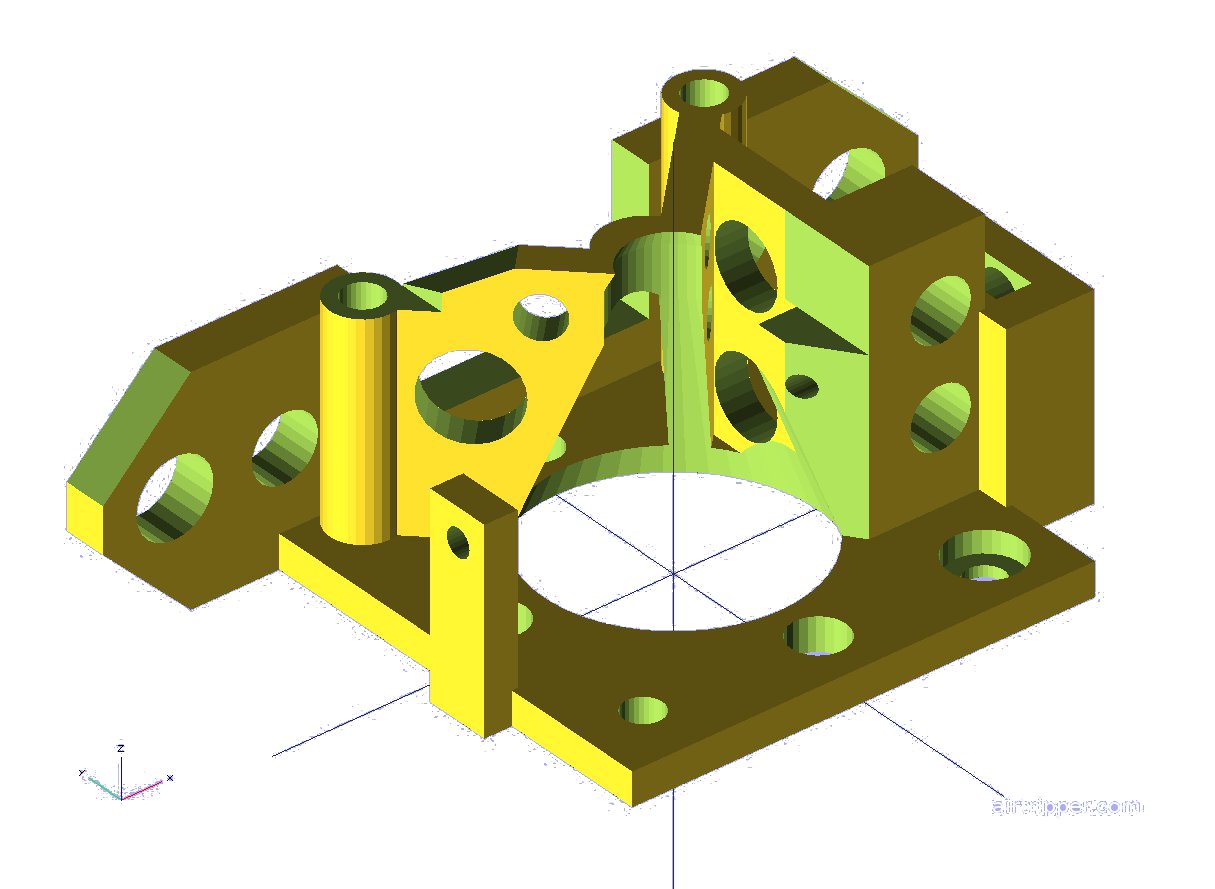 OpenSCAD 3D printer bowden extruder base model |
The 3D printer extruder has three printable parts, the main body that attaches the stepper motor and the printer, an idler pivot support strut and the idler housing. All the parts are created with OpenSCAD 3D modeller and exported to STL to be converted to GCode by Skeinforge. The printer extruder currently under test was printed with 0.2mm layer height at 16mm/s and with hot end temperature set at 190 degree C.
Signing Off
I guess that will do for now until Part 3 of the Extruder Upgrade. Part 3 will include all the files including STL files, for those not familiar with OpenSCAD, so that you can print your own. A bill of materials will also be included which all items can be obtained from Ebay.
[bodyadsrich1l]
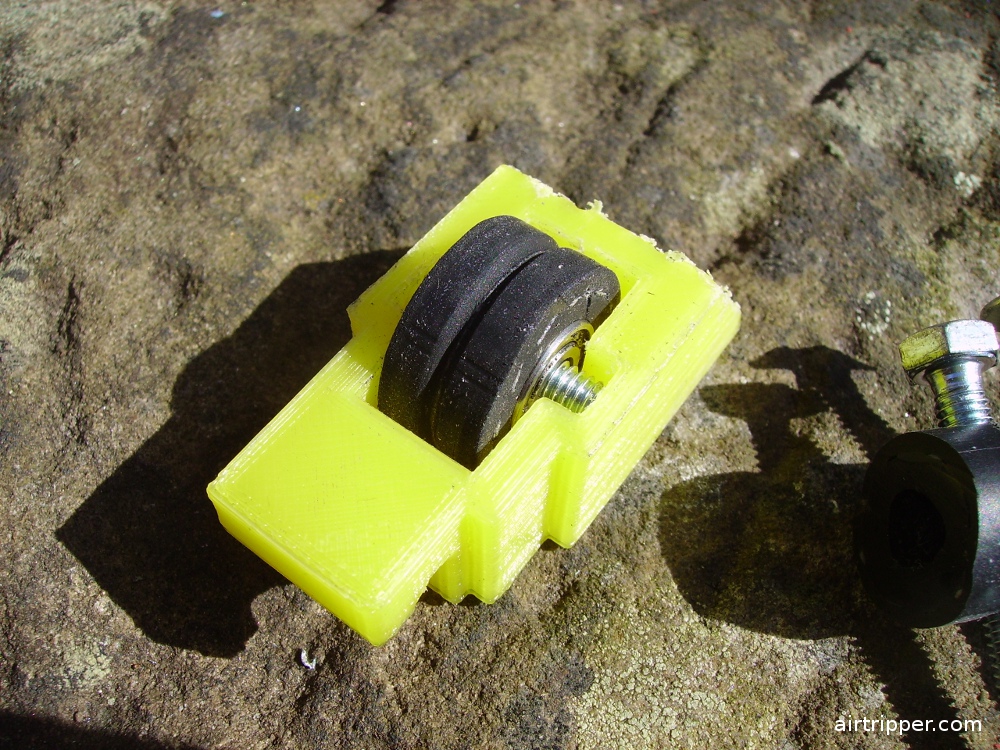 3D Printer Extruder Idler Showing Rubber Pinch Roller |
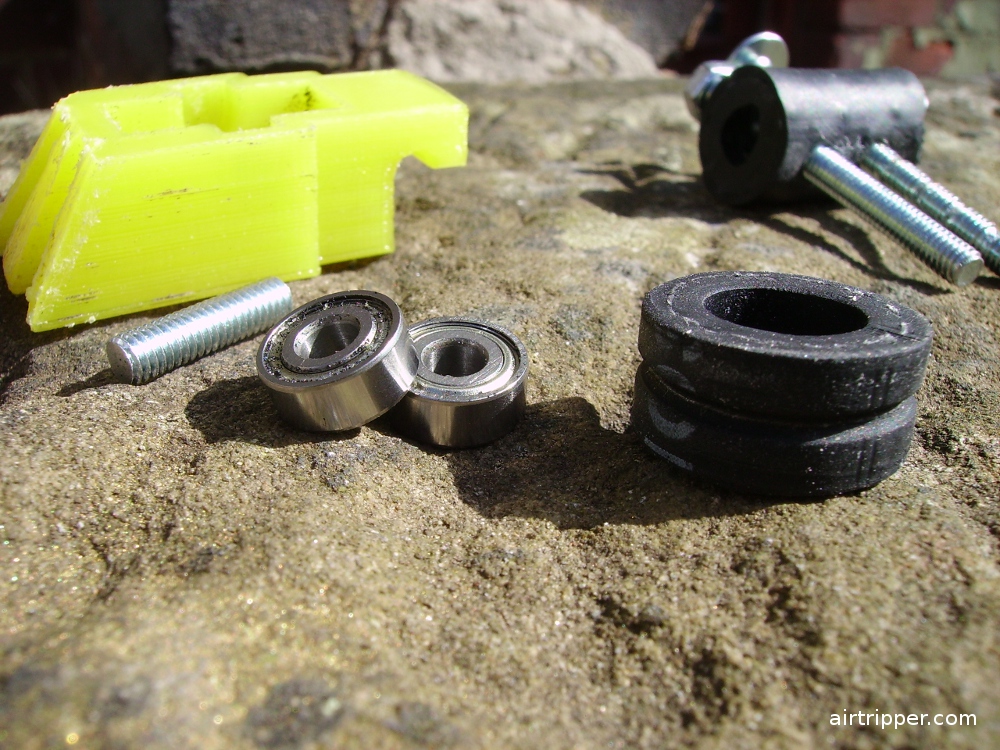 3D Printer Extruder Idler Parts, Ball Bearings and Rubber Roller |
 3D Printer Extruder Idler Parts, Rubber Pinch Roller |
 SUMPOD 3D Printer Extruder Idler Hack |
